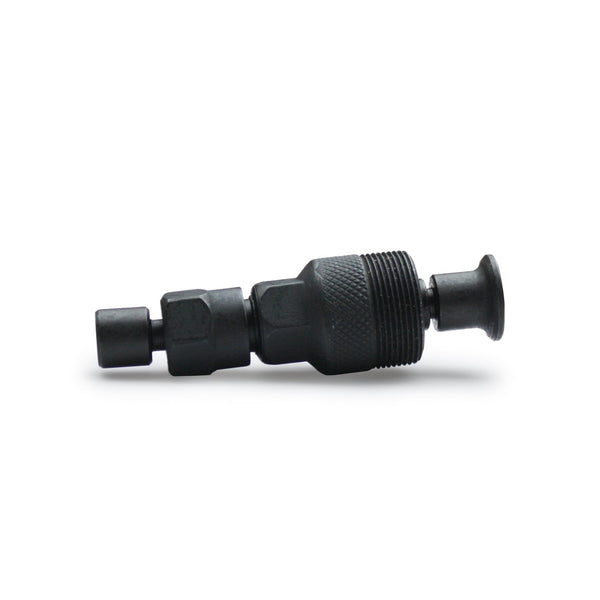
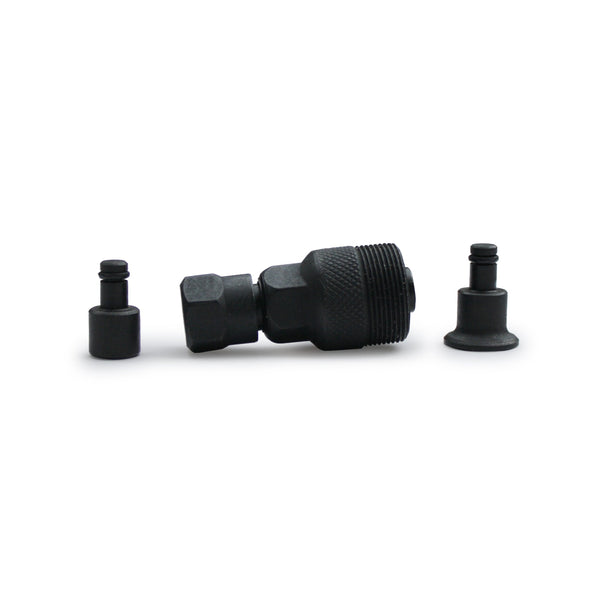
Compact Crank Remover
Regular price $24.99
Unit pricet per
- 6451201
Compact Crank Remover
Crank Puller for Square Taper and Splined Cranks
- Made from heat-treated tool steel.
- New design includes two tip inserts and fits all cranks using 22mm x 1 threads with square taper or splined bottom bracket spindles.
- Precision tolerances provide perfect fit and floating tip design ensures easy crank removal.
- Works with any 15mm wrench like Pedro's Ratcheting Combo Wrench or pedal wrenches.
Pedro's new Compact Crank Remover provides the professional quality, precision fit tool required to properly remove press fit square taper or splined cranks. The Crank Remover is made from heat-treated tool steel for the ultimate in strength and lasting performance and features a floating tip design for easy crank removal. New design includes two tip inserts and fits all cranks using 22mm x 1 threads with square taper or splined bottom bracket spindles. Works with any 15mm wrench like Pedro's Ratcheting Combo Wrench, Equalizer Pedal Wrench, or 15mm Pedal Wrench. Backed by Pedro's lifetime warranty.
Replacement Part: Splined Tip Insert for Crank Removers
Replacement Part: Square Taper Tip Insert for Crank Removers
Usage
- Remove the Crank Bolt. Rotate the crank arm to access the fixing bolt. Use an 8mm hex to loosen and fully remove the crank bolt from the center of the crank arm. Some cranks may use a 14mm hex bolt requiring use of a 14mm socket tool instead.
- Prepare the Crank Remover. Inspect the threads on your crank arm and on the crank puller tool to ensure they are clean. For smaller square taper bottom brackets/cranks, insert the small diameter insert/tip into the end of the tool. For larger splined bottom bracket axles, insert the large diameter insert/tip into the end of the tool. Thread the large outer portion of the tool to the end so the insert/tip no longer protrudes from the end.
- Thread the Crank Remover into the Crank Arm. Thread the large outer threads of the crank remover into the crank arm by hand clockwise. Make sure it’s fully threaded in and straight. Start slowly to avoid cross-threading. Once snug by hand, you can tighten a bit more with your fingers or a wrench but don’t over-torque.
- Turn the Crank Puller’s Press Screw. Start turning clockwise the smaller back-end of the crank puller using a 15mm wrench on the hexagonal portion. At first it will likely turn easily with no resistance. As you turn, the center and insert/tip move towards the bottom bracket and will then push against the bottom bracket spindle pulling the crank arm outward. This may require applying significant force at first. Keep turning and force needed should lessen. Support the crank arm as it is removed. When fully loosened it will fall off the bottom bracket spindle.
- Remove the Tool from the Crank Arm. Unthread the large outer threads of the crank remover from the crank arm by turning counterclockwise. If it is stuck, a wrench may be needed.
- Repeat Steps 1-5 for the other crank arm.